5L garden sprayer
User’s Manual

| IMPORTANT SAFETY INSTRUCTIONS! READ CAREFULLY BEFORE USING THE PRODUCT AND KEEP FOR FUTURE REFERENCE! |
The User’s Manual is a part of the Sprayer. Please keep it in good conditions. In order to utilize and maintain the sprayer in a good manner, please read the User’s Manual carefully prior to operation. If you have any doubt, contact the distributor.
The sprayers shall be used only with plant protection products approved by local/national regulatory authorities (e.g. BBA) for plant protection products for use with knapsack sprayers.
Major Applications
Fit for pest control of small nursery, flowers and garden, as well as cleaning of home environment and sterilizing of livestock and fowl houses.
Structure , Features and How to work
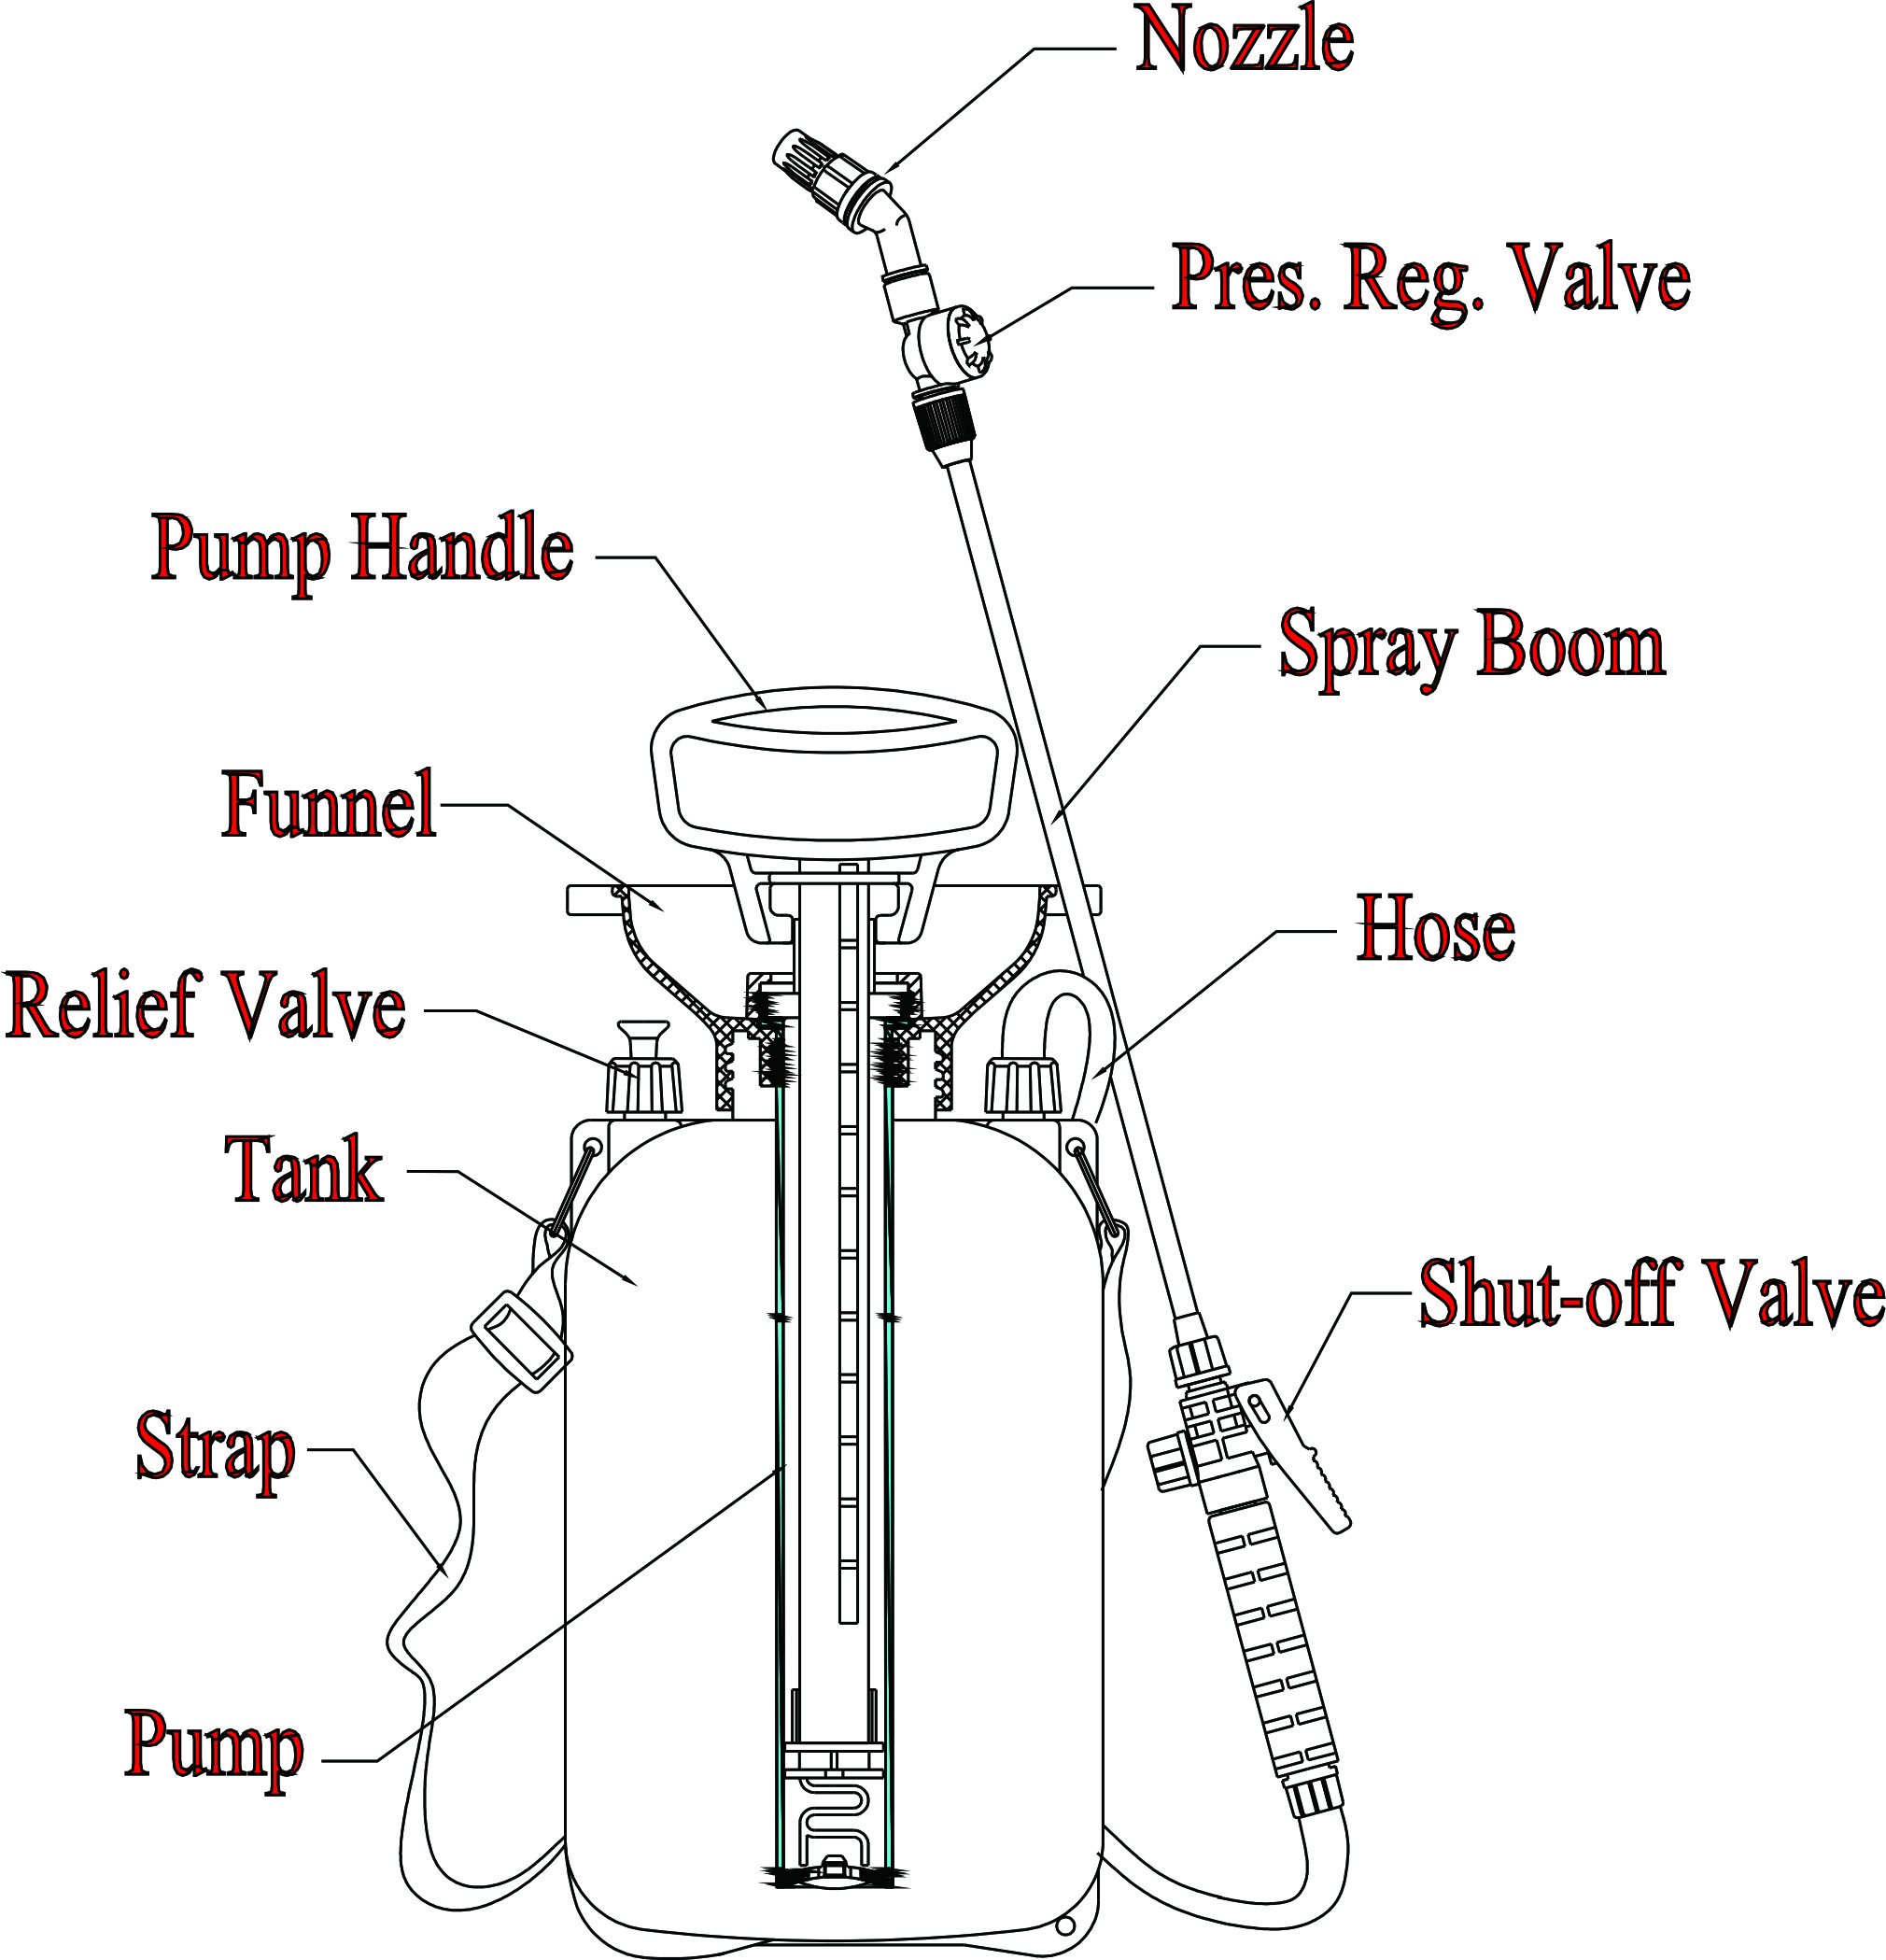
Structure
Composed of a tank, a pump unit(cylinder, handle, piston etc., spraying assembly(hose, shut-off, spray lance and nozzle), relief valve, strap, etc.
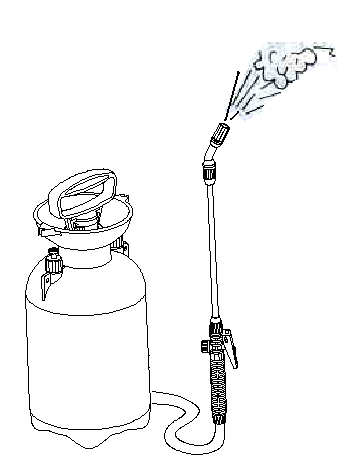
How to work
Compress the air into the tank by reciprocating motion of the piston in the cylinder, resulting in pressure difference inside and outside of the tank to push the spray mixture into hose and spray lance, and finally the nozzle to spray out.
Features
①Elegant appearance, simple structure, easy and leak-free operation;② The shut-off valve is easy and safe to operate;③ Come with a diaphragm-type pressure regulating valve to absorb shock and maintain constant pressure , resulting in even spraying and minimum pulse;④ Made of premium materials resisting acid, alkaline and corrosion to ensure durability and water-tightness.
Parts and Technical Parameters
Model No. | 3016138 |
Rated Volume | 5 L |
Working Pressure | 1-3 bar |
Safety valve | 3-3.6bar |
Working Stroke | 190 mm |
Net weight: | 1.28 kg |
Total weight: | 7.68kg |
Flow rate* | Cone nozzle | 0.50 L/min |
Fan nozzle | 0.40 L/min |
Pres. Reg. Valve | Open Pres. | 1.4±0.2bar |
Close Pres. | 1±0.15bar |
Total residual volume | approx. 30 ml |
Tank Size | ∅185×455mm |
Remark: * Flow rate is average rate base on one whole cycle of process.
Precautions
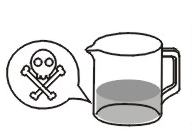
Hazards

| Read the instruction before using and keep for future reference! |
| PPE requirement: The operator shall wear a mask, operation hat, protection clothes, water-proof glove and rubber boot etc. in the process of spraying |
 Warehousing and maintaining of pesticide. It shall be kept out of the reach of children. Disposal of pesticide shall follow the safety instructions furnished by its manufacturer. Warehousing and maintaining of pesticide. It shall be kept out of the reach of children. Disposal of pesticide shall follow the safety instructions furnished by its manufacturer.
|
 In case of inhaling: Immediately leave the poisonous place to a well-ventilated place to lie down for a rest. In case of intoxication via skin contact, please rinse with water immediately;In case of ingestion, induce vomiting with clean water or salt water and go to hospital as soon as possible. In case of inhaling: Immediately leave the poisonous place to a well-ventilated place to lie down for a rest. In case of intoxication via skin contact, please rinse with water immediately;In case of ingestion, induce vomiting with clean water or salt water and go to hospital as soon as possible.
|
 Never spray at human beings or animals. Never operate against adverse wind. Never spray at human beings or animals. Never operate against adverse wind.
The sprayer is NOT a toy.
|
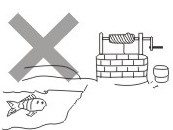 The residual chemical shall be kept in a container instead of being poured onto the field, ground and rivers. The empty bottles and bags shall either be collected and sent to the manufacturer for proper disposal or buried a barren land with deep under-ground water level and small rainfall far from living areas and water sources.。 The residual chemical shall be kept in a container instead of being poured onto the field, ground and rivers. The empty bottles and bags shall either be collected and sent to the manufacturer for proper disposal or buried a barren land with deep under-ground water level and small rainfall far from living areas and water sources.。
|
Warning
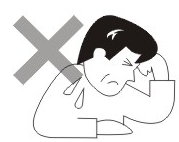 Only trained, healthy and rested operators may work with the product. Do not use the product when tired, ill or under the influence of alcohol, drugs or medication. Only trained, healthy and rested operators may work with the product. Do not use the product when tired, ill or under the influence of alcohol, drugs or medication.
Ensure inexperienced users receive a proper training before use. |
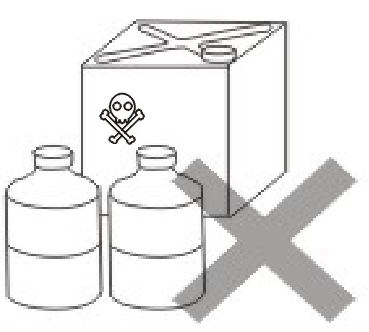 Never use strong acid, strong alkaline and inflammable solutions. Never use highly-toxic and highly-persistent pesticide for pest control of vegetables, melon crops, fruit trees, tee, herbal medicines etc. And the harvesting time after pesticide application shall be long enough. Never use strong acid, strong alkaline and inflammable solutions. Never use highly-toxic and highly-persistent pesticide for pest control of vegetables, melon crops, fruit trees, tee, herbal medicines etc. And the harvesting time after pesticide application shall be long enough.
|
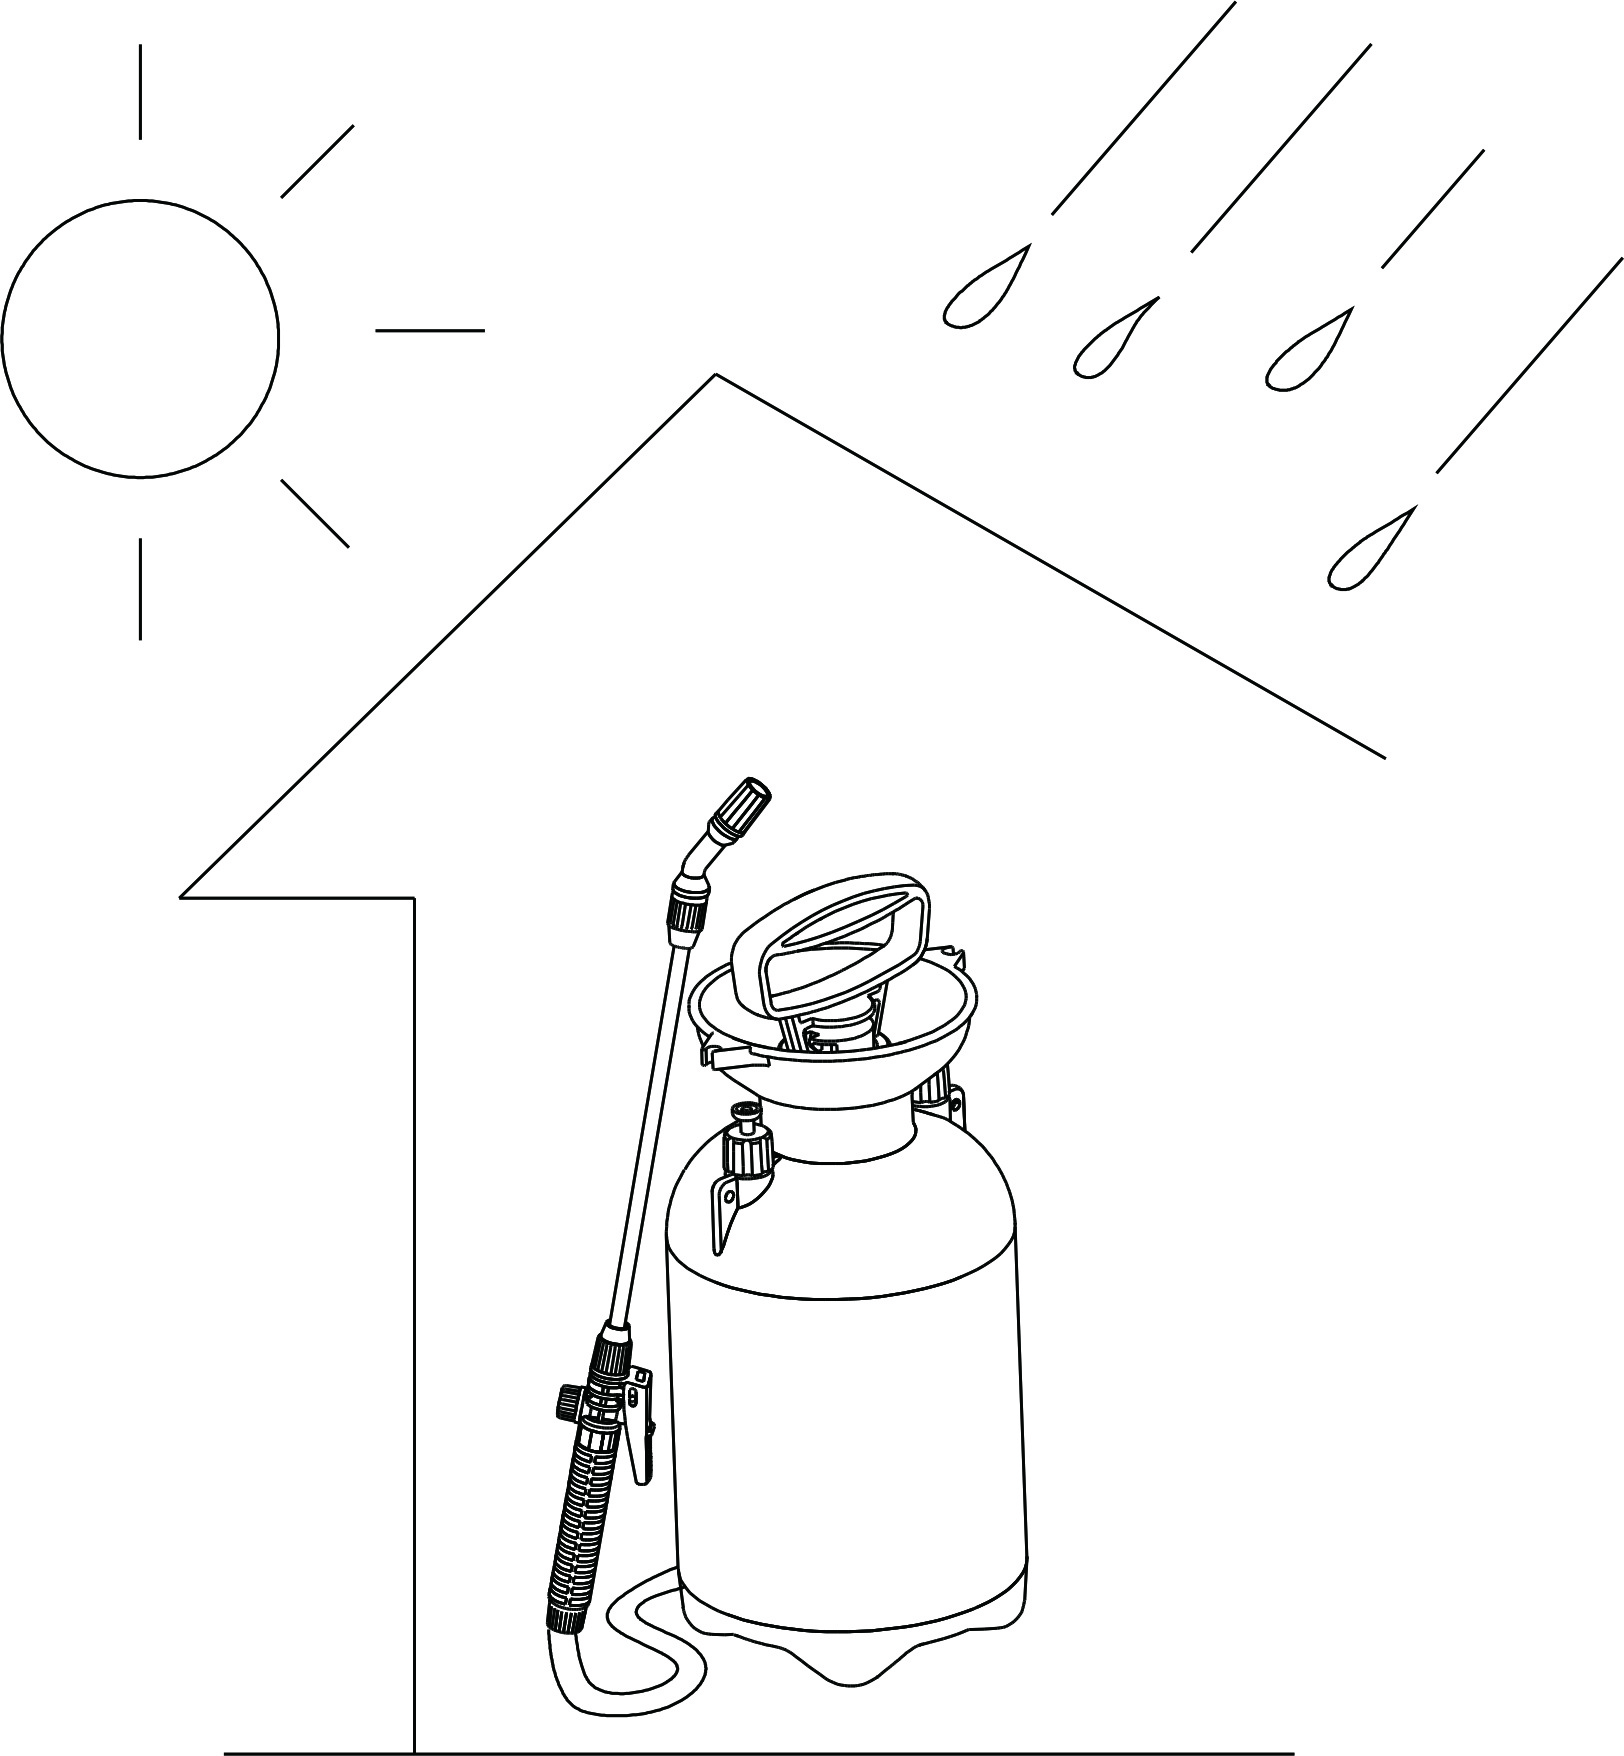
 Keep far away from heat sources and prevent against exposure to strong sunshine. Keep far away from heat sources and prevent against exposure to strong sunshine.
|
 Don’t keep at a public place unattended which may endanger public security. Don’t keep at a public place unattended which may endanger public security.
|
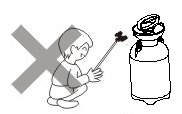
Do not attempt to remove congestions by blowing into parts of the product with your mouth. Do not connect the product to another pressure source e.g. air compressor. Secure the product against falling, overturn, vibration, extremely high or low temperatures, direct sunlight and impacts during transportation to avoid damages and spillage. Do not attempt to repair or modify the product in any way. Clean and maintain the product as described within this instruction manual. Only use spare parts and accessories recommended by the manufacturer. Repairs shall only be carried out by the manufacturer, its service agent or similarly qualified persons. Failure to do so may result in hazard. Check the product regularly each year after winter by using of clean water. Check product before each use Consider wind, rain and other climate and environmental conditions to avoid hazard through uncontrolled or unintended liquid distribution. Avoiding drift during spraying operation. Do not use the sprayer when any leakages, uneven spray jet. |
Cautions
 The liquid for application in this Sprayer shall not exceed 40°C. The liquid for application in this Sprayer shall not exceed 40°C.
|
 Trial spraying with clean water , and a check of tank, hose, shut-off and nozzle for possible leakage are required prior to operation. Trial spraying with clean water , and a check of tank, hose, shut-off and nozzle for possible leakage are required prior to operation.
|
 The preparation of chemical shall follow the instructions and formula furnished by the pesticide manufacturer. Unauthorized altering of the dilution rate of chemical is prohibited, which may either endanger the human being and animal, or result in the failure of pest control. The preparation of chemical shall follow the instructions and formula furnished by the pesticide manufacturer. Unauthorized altering of the dilution rate of chemical is prohibited, which may either endanger the human being and animal, or result in the failure of pest control.
Check the volume application rate before Work. |
 Upon the finish of operation, you shall change clothes and wash those exposed part of body such as hands and face. In case of highly toxic pesticide and germicide, a shower after operation is required to ensure safety. Upon the finish of operation, you shall change clothes and wash those exposed part of body such as hands and face. In case of highly toxic pesticide and germicide, a shower after operation is required to ensure safety.
|
How to Operate the Sprayer
Check to ensure all the parts in the packing list is available upon unpacking, before assembling in line with the diagram.
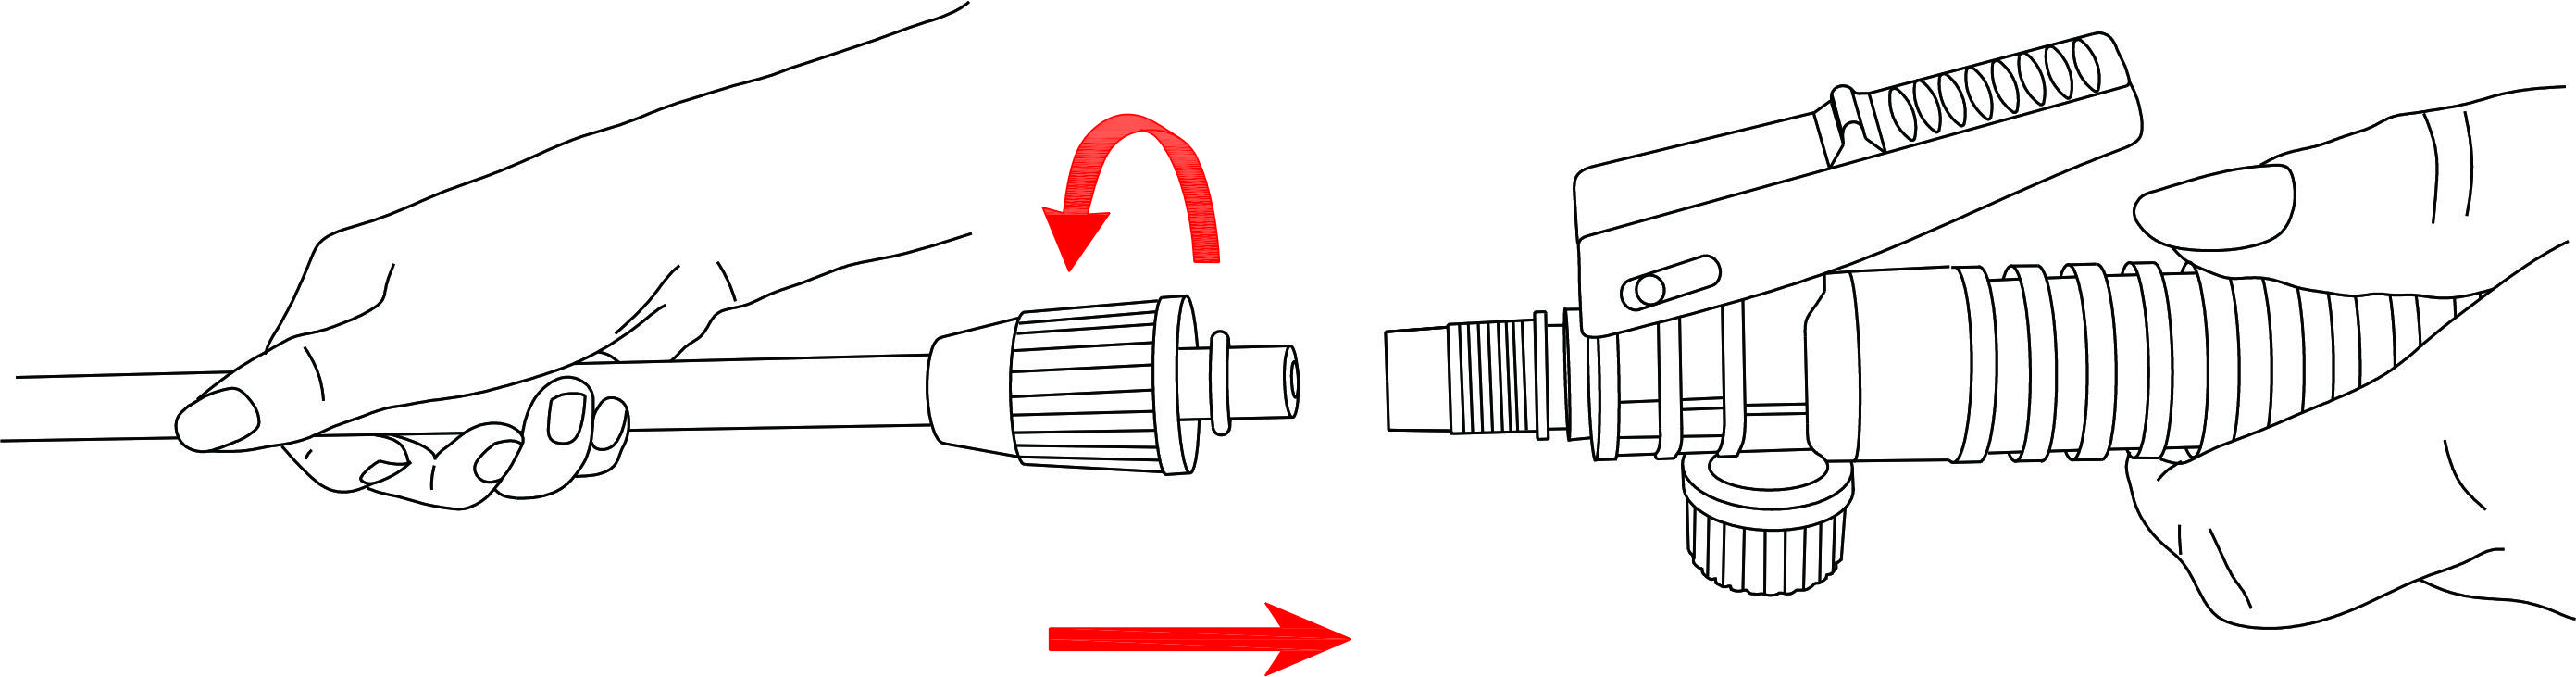
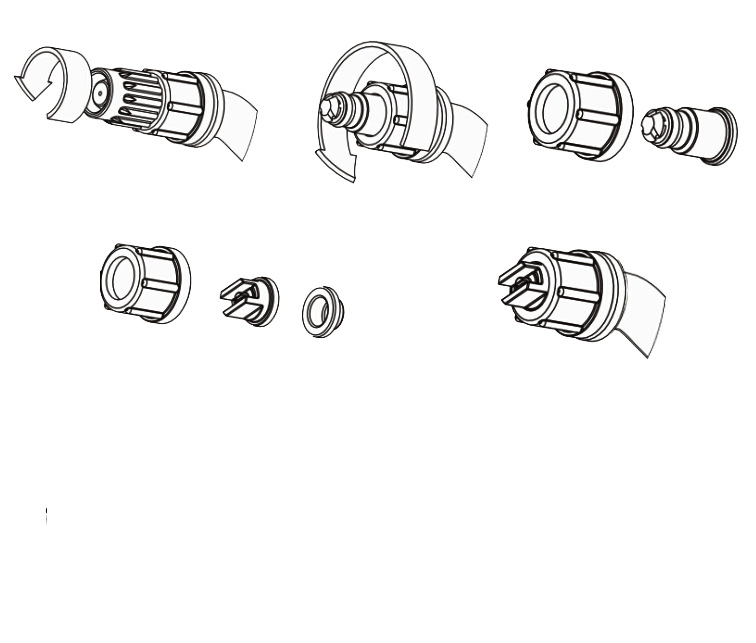
Assembly of spray head
2. Assembly of spray lance
3. Spraying
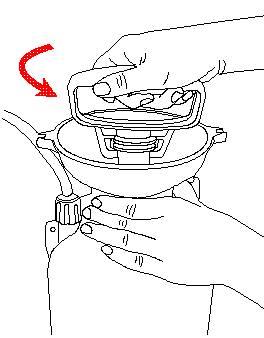
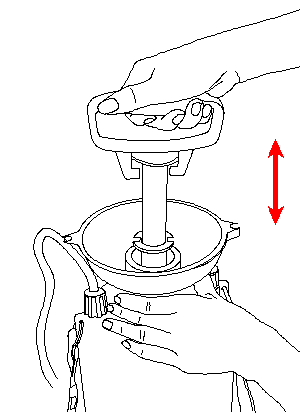
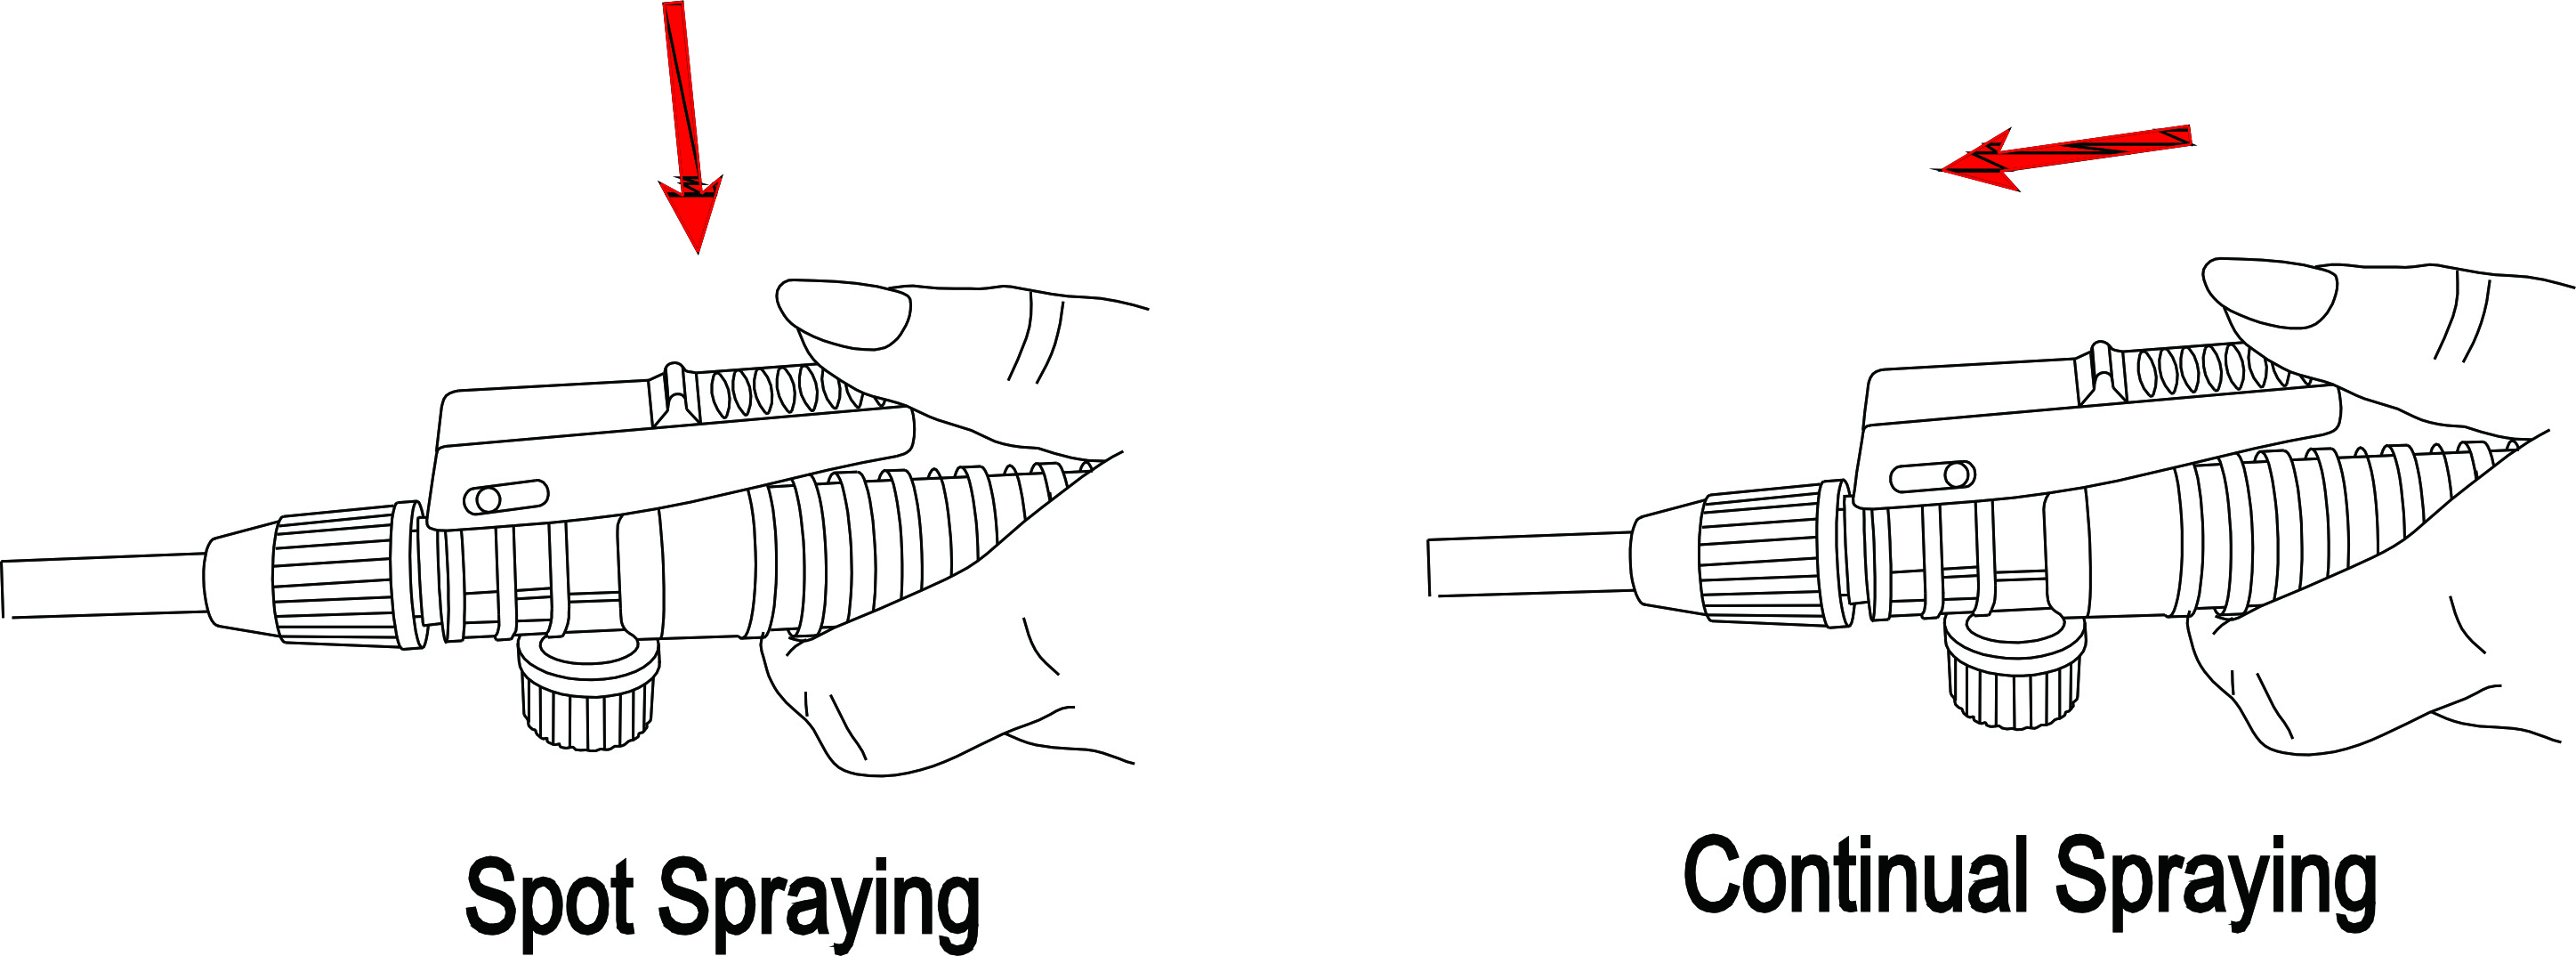
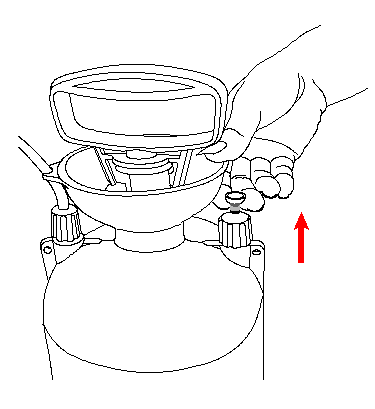
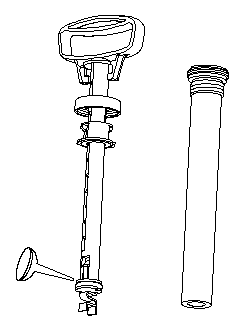
Before spraying, you shall hold the pumping handle to force its lower end into the groove of the guide base and turn the handle to remove the pump unit so as to fill the tank with prepared spray chemical to rated volume, followed by replacing the pump and pumping to inflate the tank(Make sure the shut-off valve on Shut position) . When the pressure inside the tank increases, you may hold-down the shut-off valve to start spot or continual spraying. The nozzle cap may be varied to select proper spraying type to meet the demands of crops.
4. Control of Shut-off Valve
5. About the Pressure Regulating Valve
The Pressure Regulating Valve is an important device to reduce spraying pulse, maintain the constant pressure, ensure even spraying, minimize environmental pollution and enhance the pest control performance.
The Pressure Regulating Valve is normally-closed with its open pressure set at 1.4±0.2bar, and close pressure set at 1±0.15bar. When the pressure inside the tank increases to above the set open pressure, the sprayer starts spraying by holding down its shut-off valve. When the pressure is lower than the close pressure, the regulating valve will shut-off by itself and stop spraying. You shall inflate the tank if you desire to proceed to spray.
Note: Residual pressure will be maintained in the tank even upon the finish of spraying due to the regulating valve. Please release the pressure before removing the pump by following the instructions (as given in the Relief Valve)
 6. Relief Valve
Relief Valve is an important part of the Air-compressed Sprayer. When the pressure inside the tank exceeds the set value, the Valve will open by itself to discharge a certain amount of air quickly to maintain the internal pressure below the set value and ensure reliable and safe operation.
Note: You may lift the valve thimble of the relief valve to relieve the residual internal pressure before removing the pump.
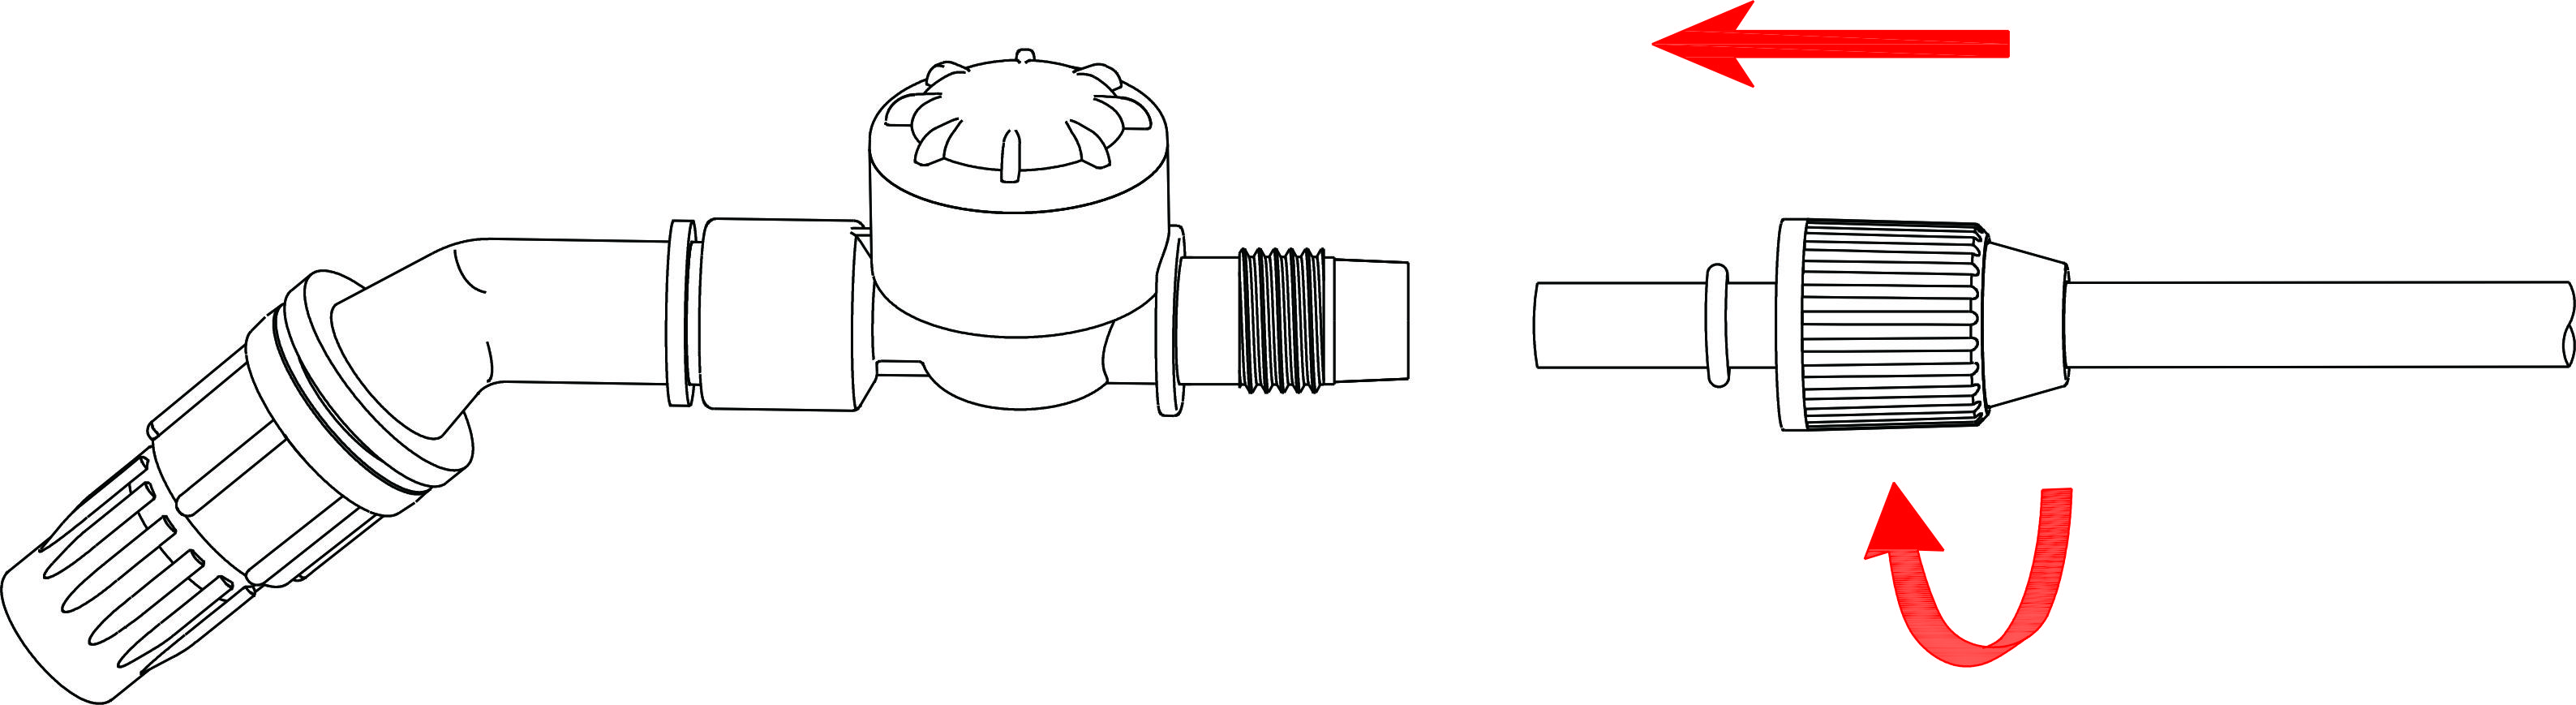
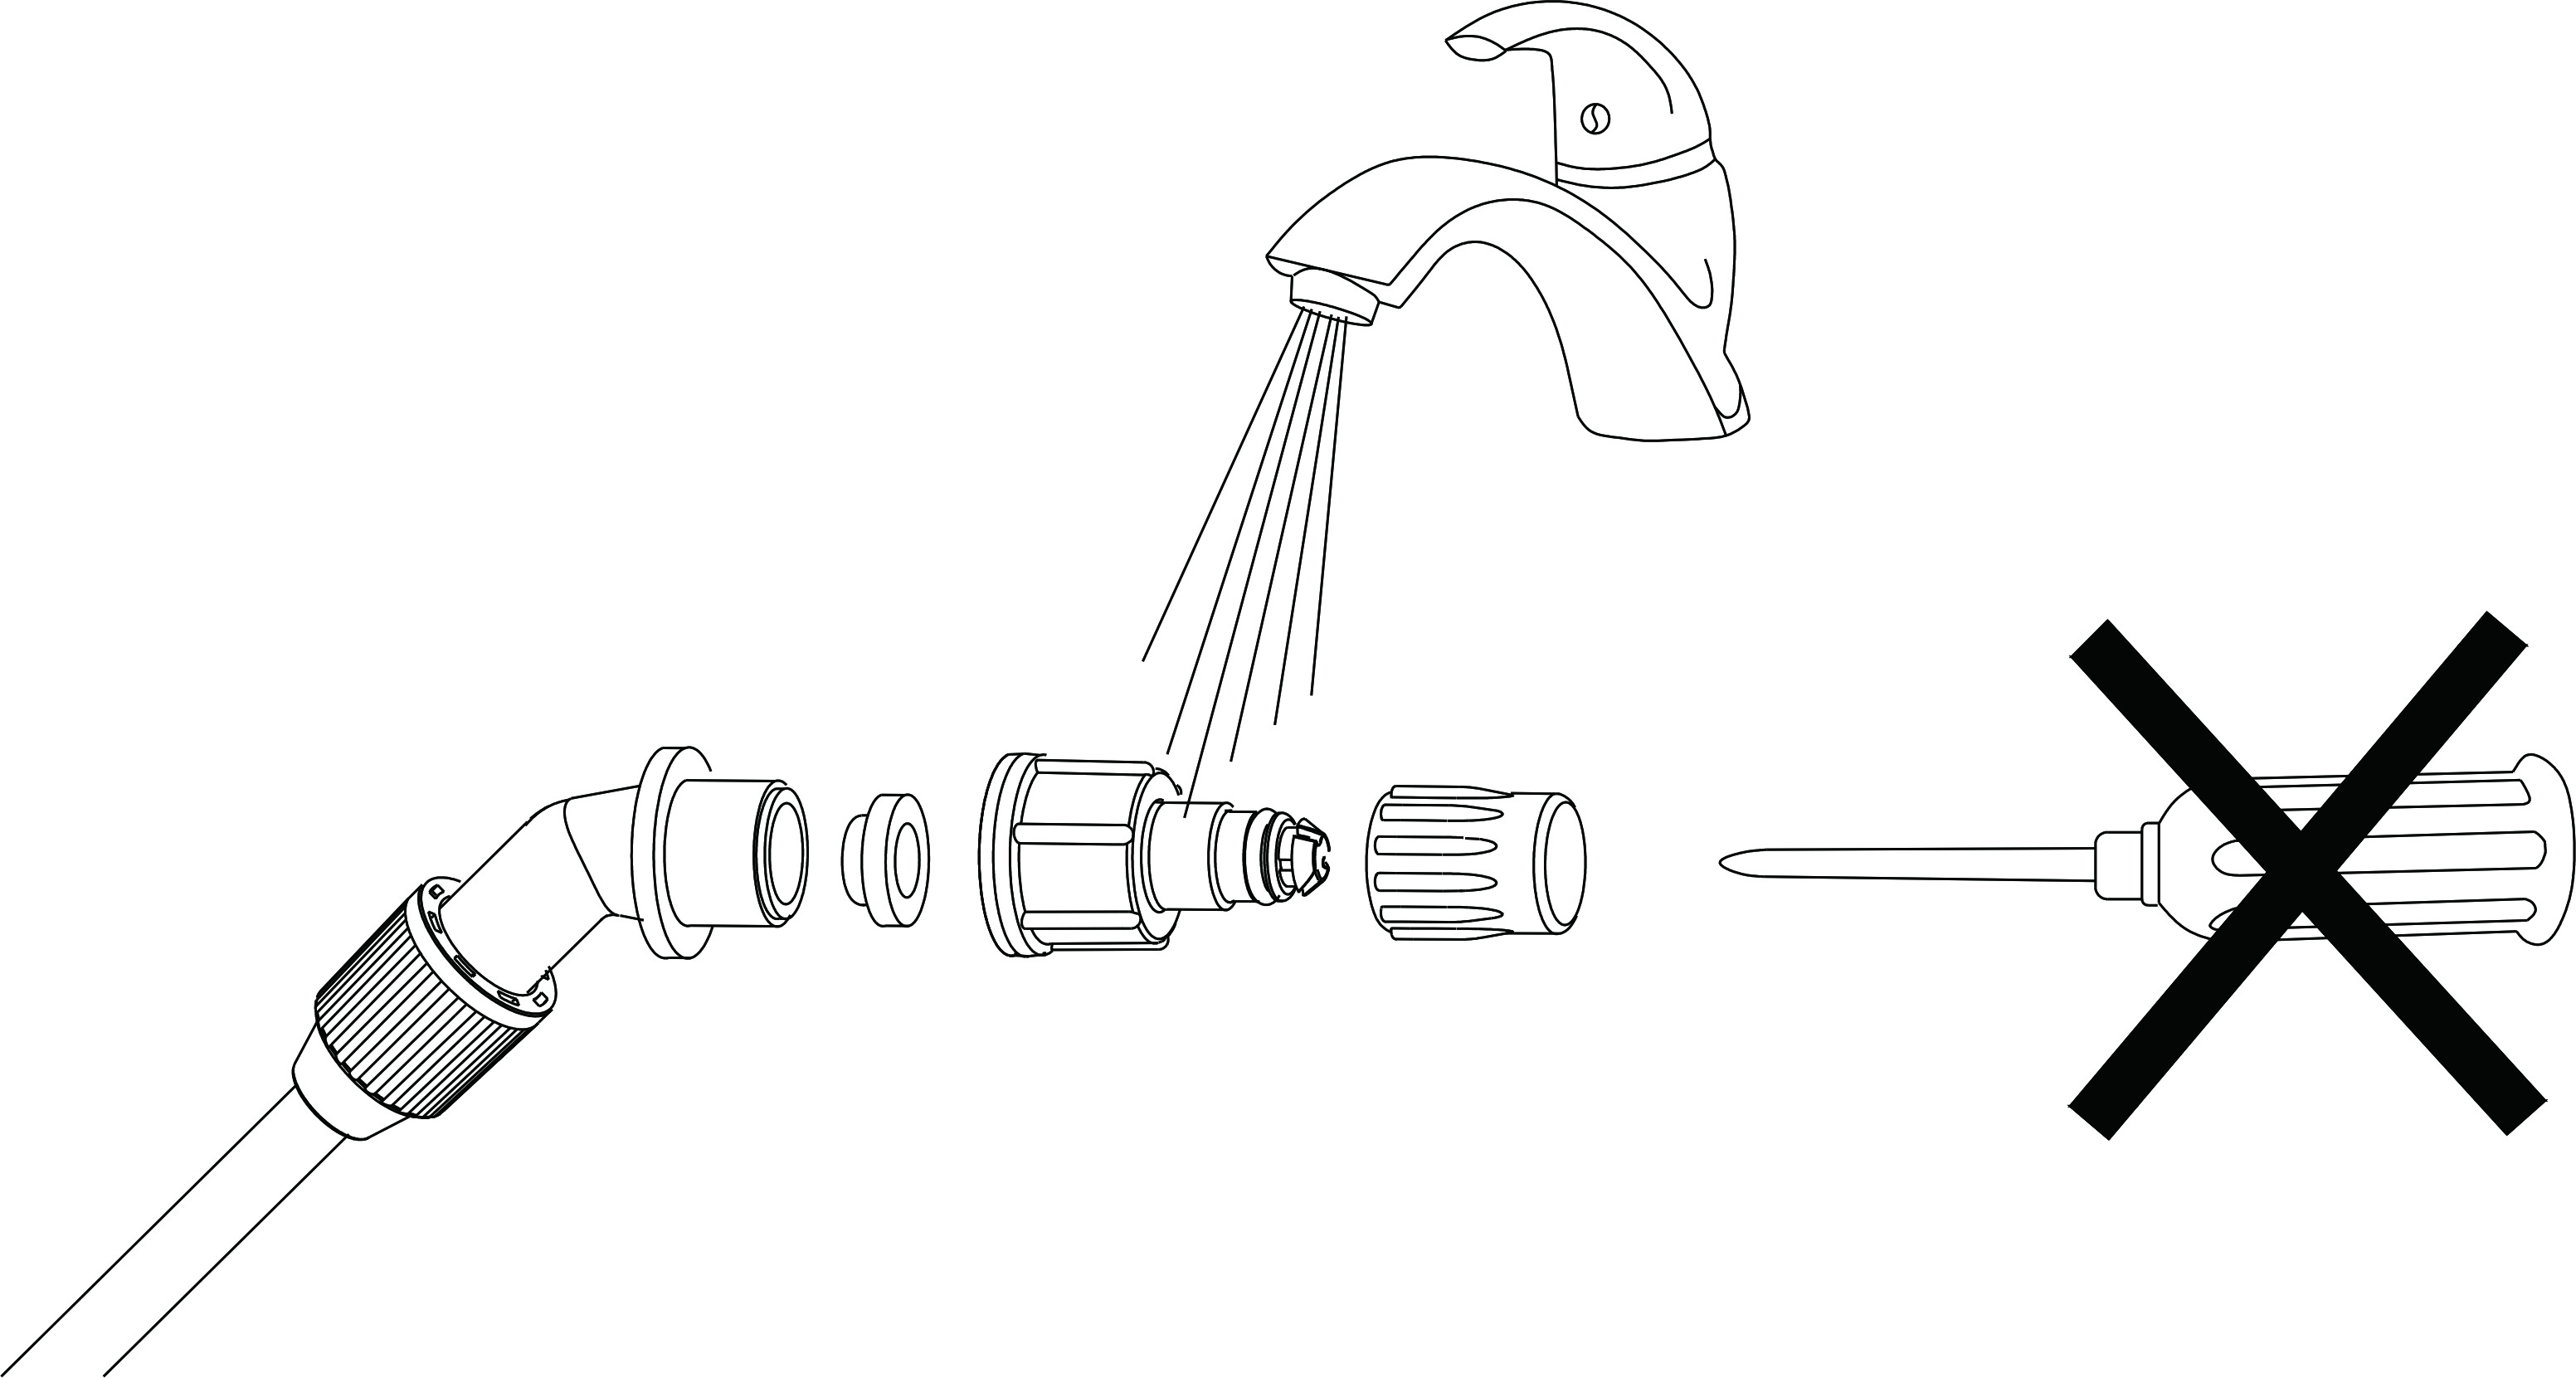
7. Adjustment of Spray Nozzle
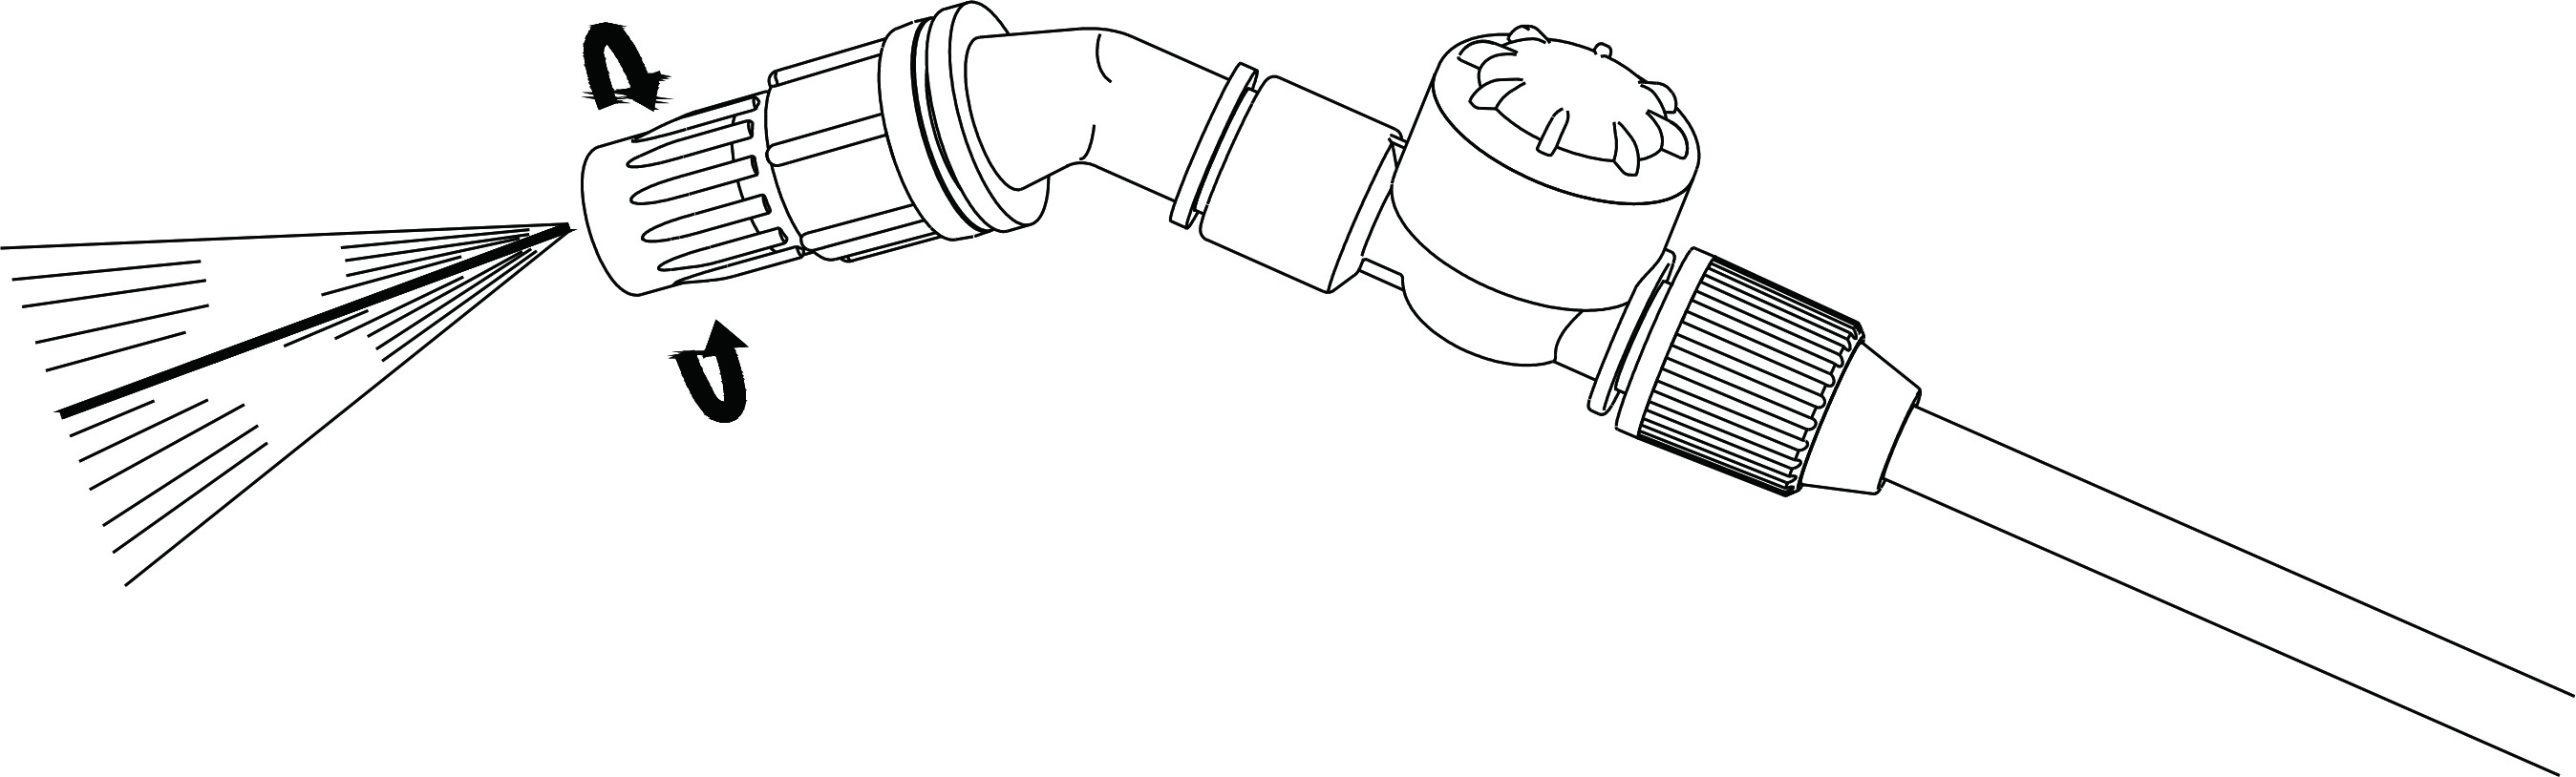
Changing of spray nozzle
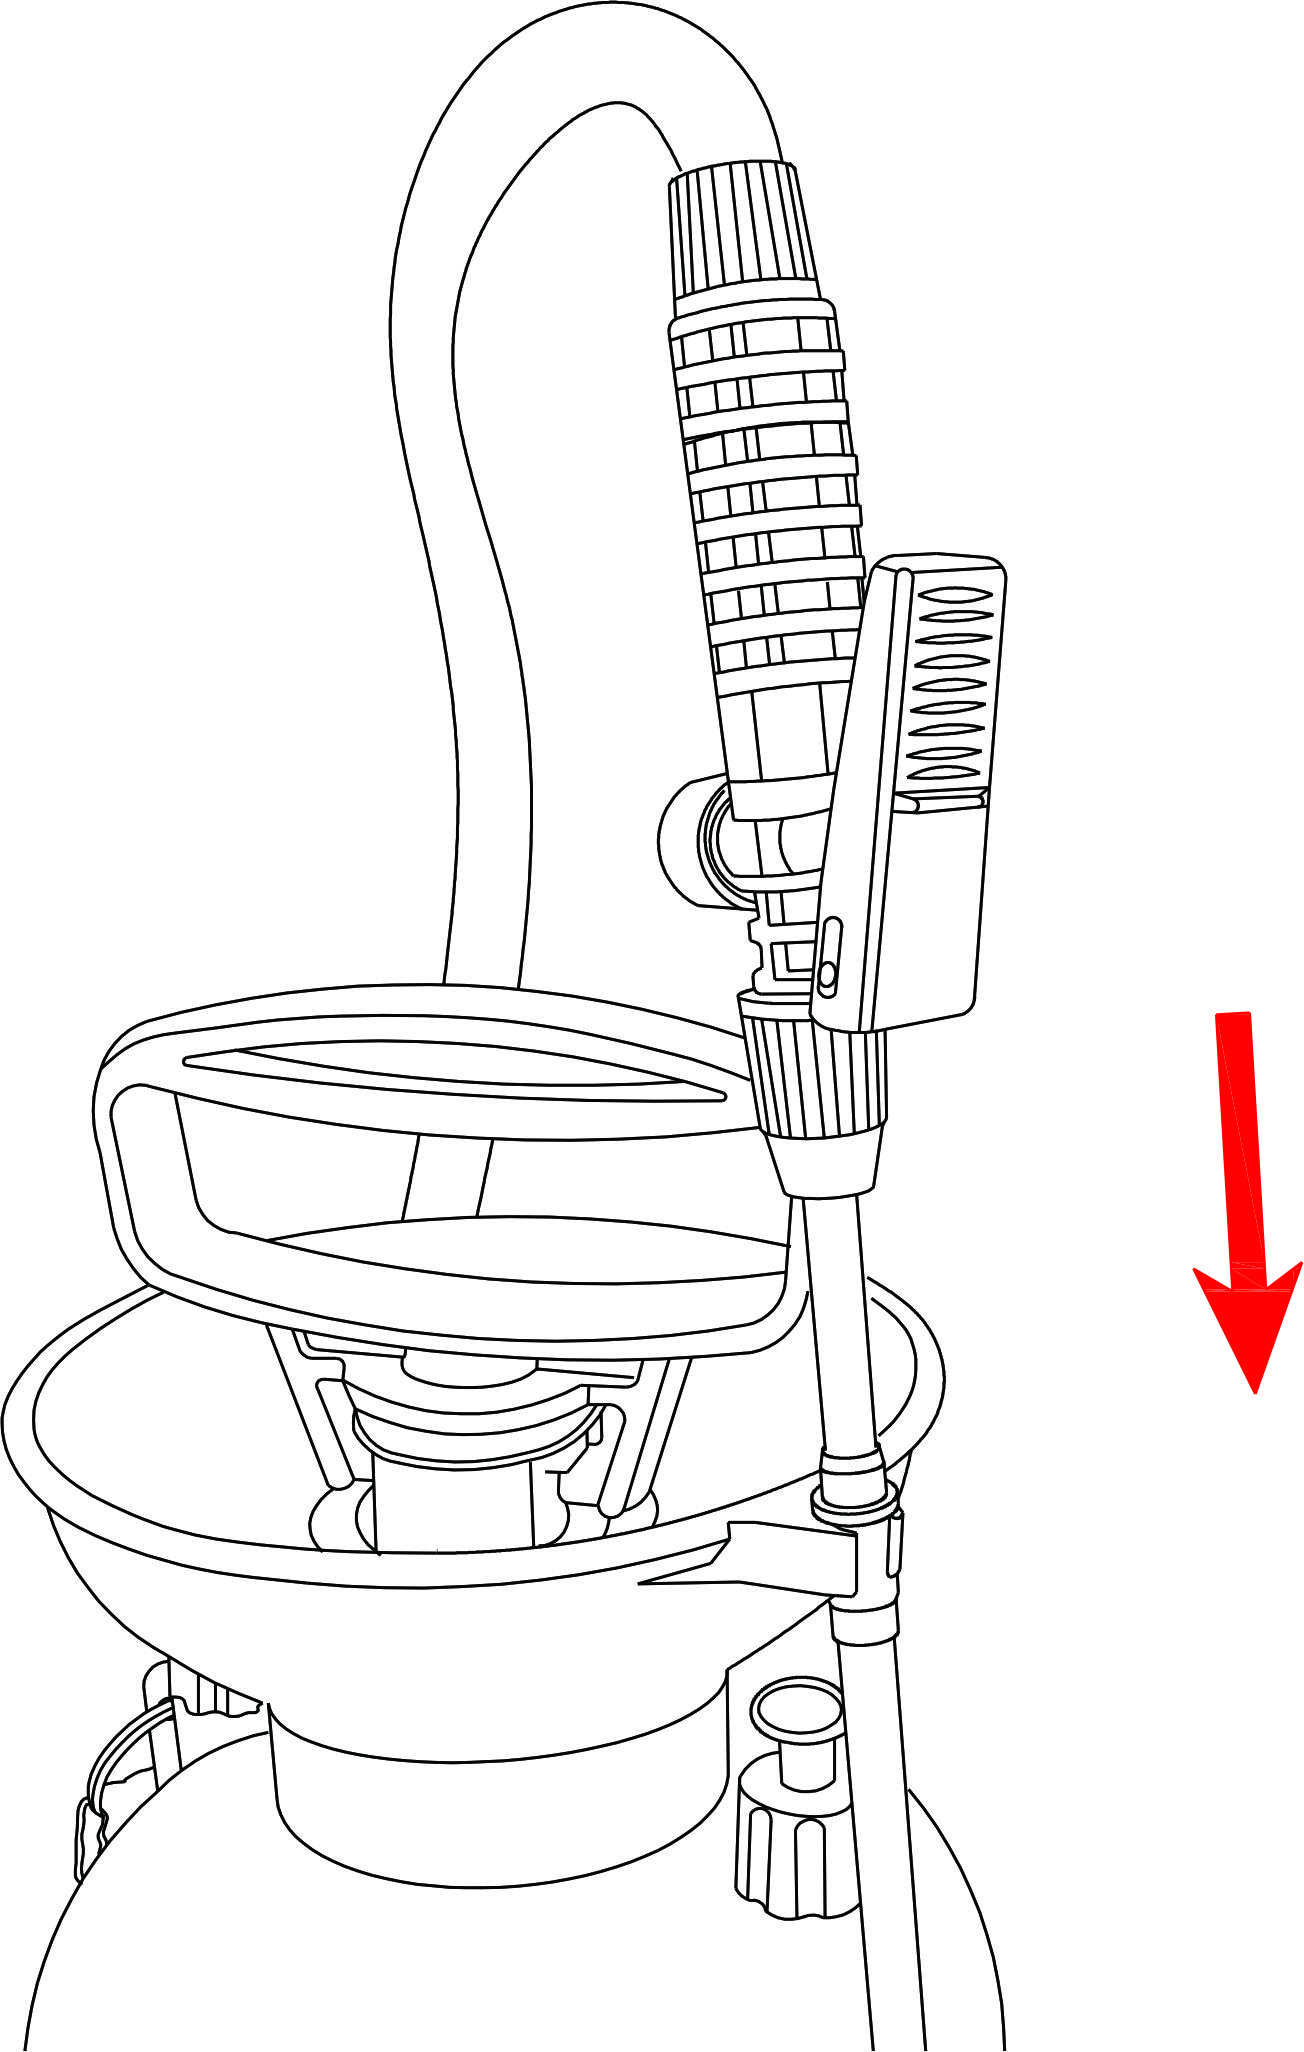
Parking of spray lance
Vi. Structural Diagram and Schedule
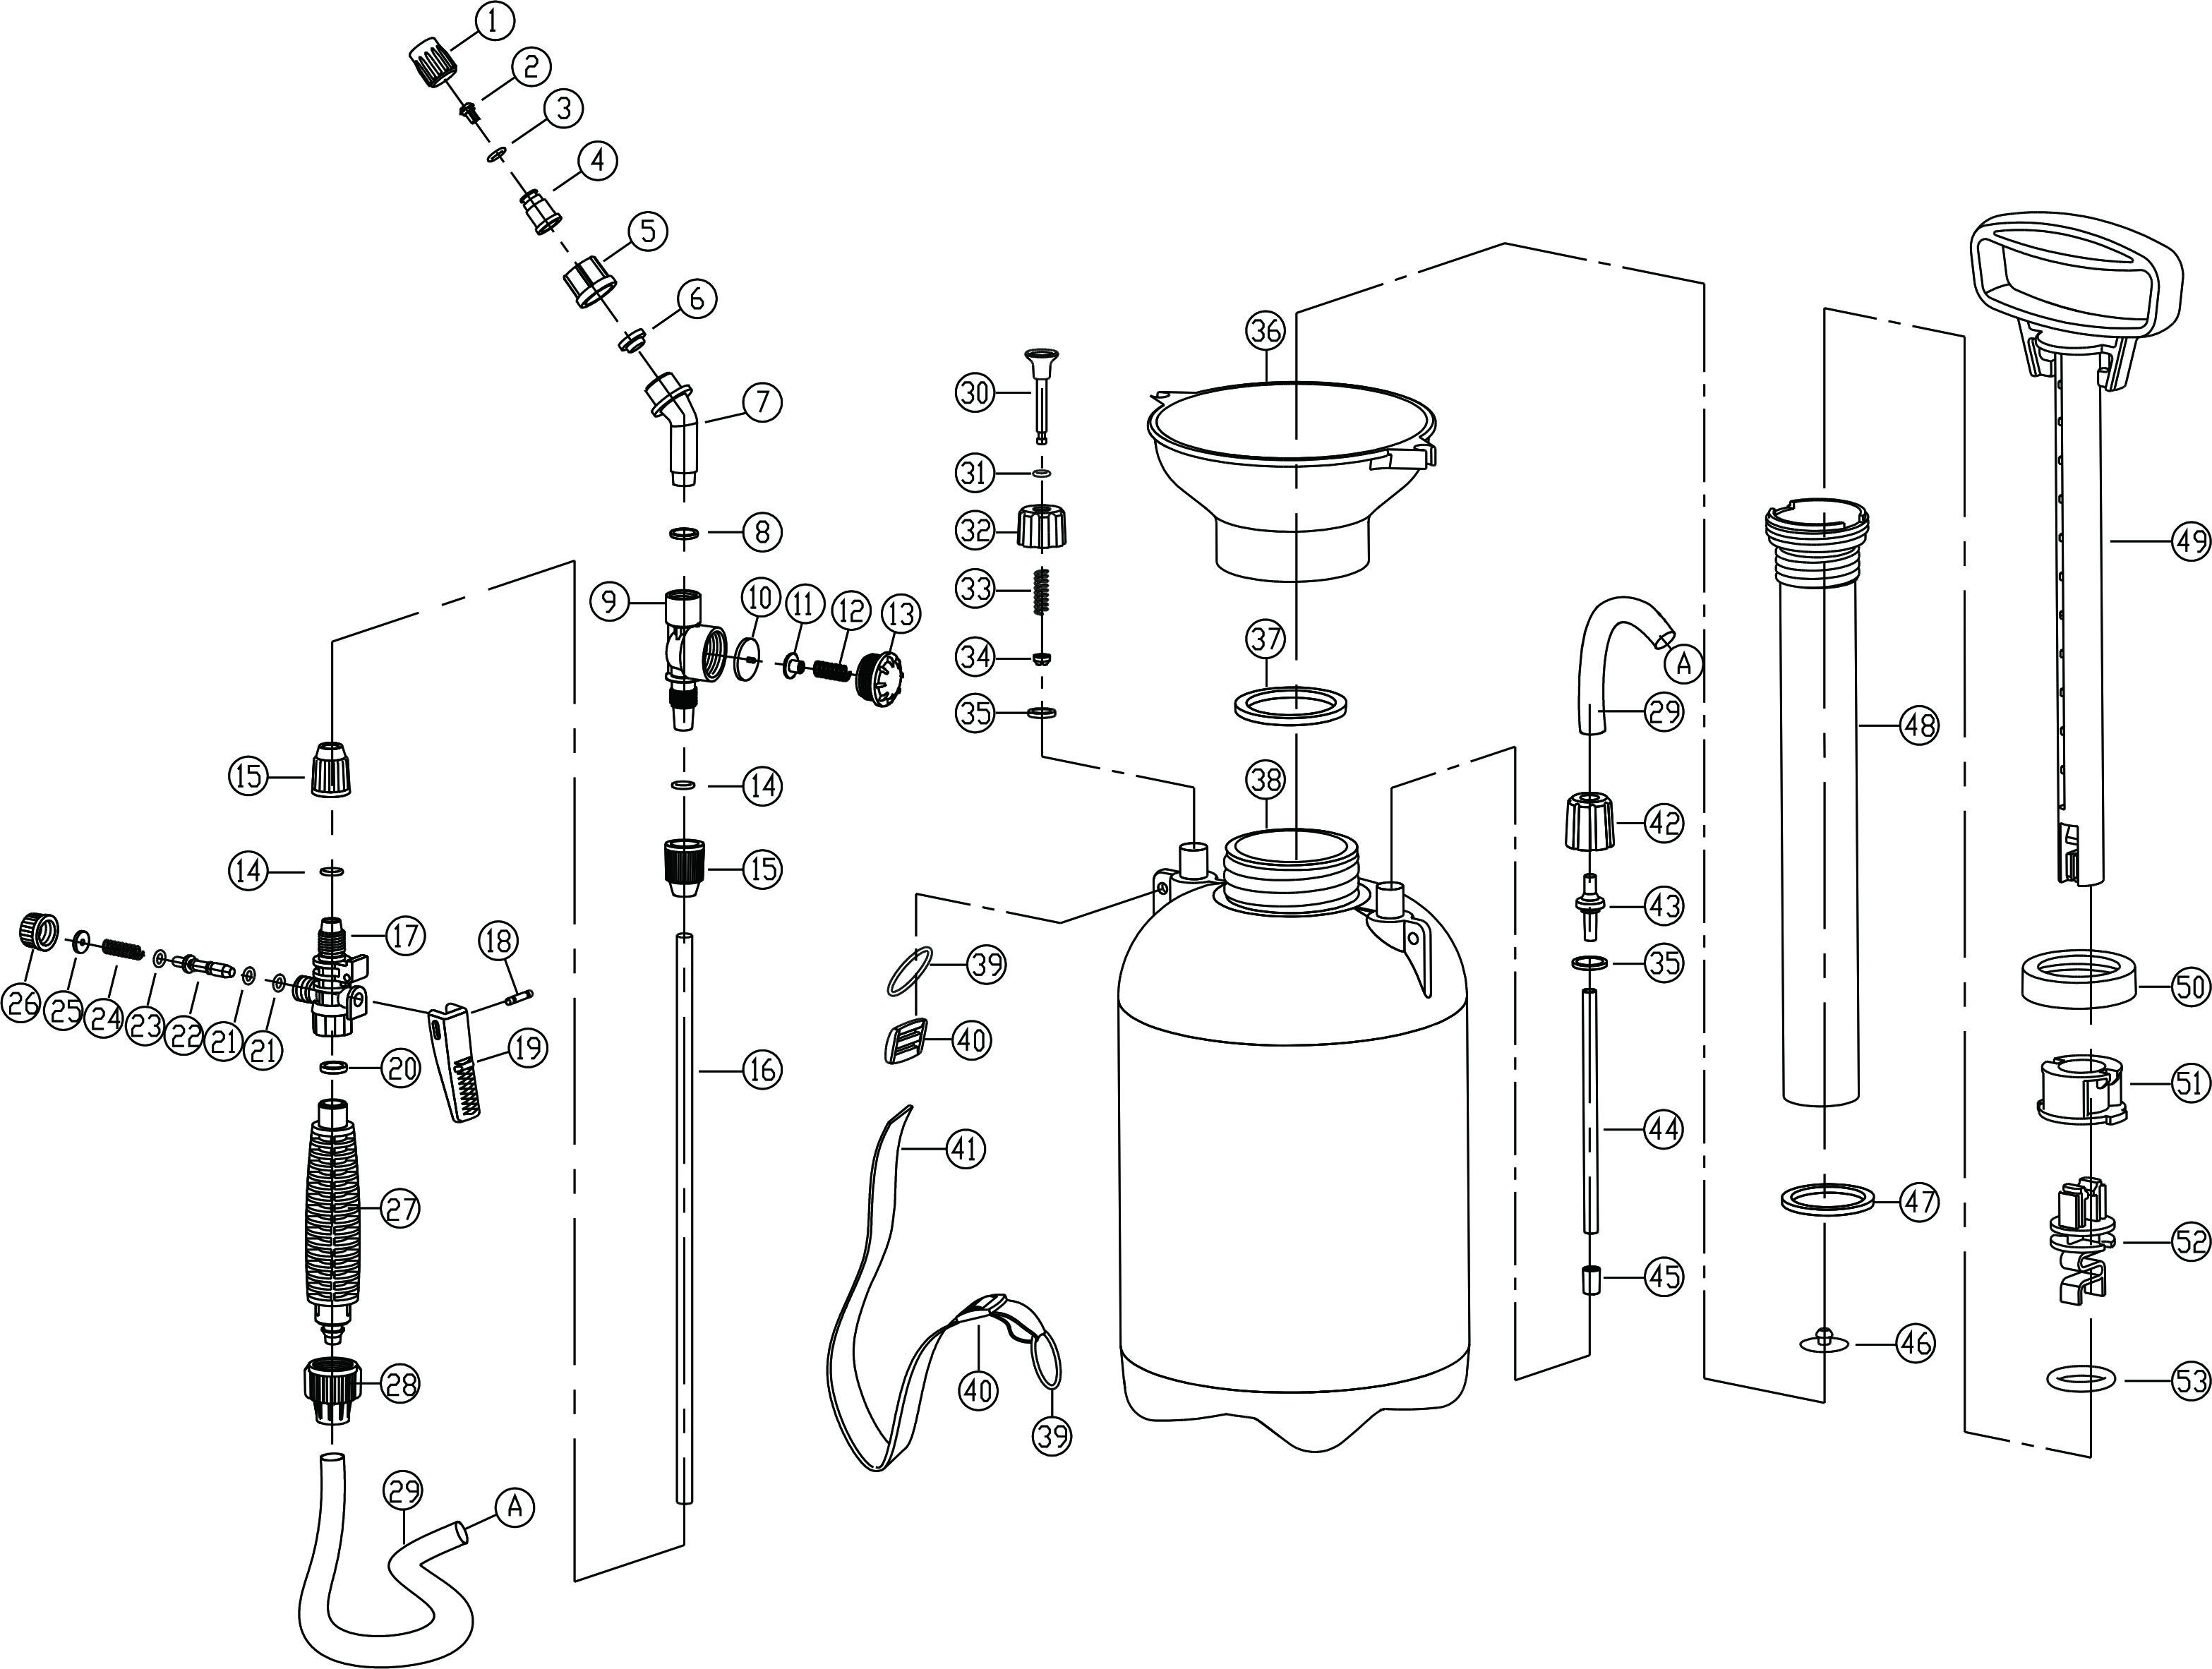
S/N | Description | Qty. | S/N | Description | Qty. |
1 | Cone Spray Nozzle | 1 | 28 | Hose cap I | 1 |
2 | swirl core | 1 | 29 | Hose | 1 |
3 | Spray lance O-ringΦ10.7×1.8 | 1 | 30 | Relief valve thimble | 1 |
4 | swirl nozzle | 1 | 31 | O-ring Φ7.5×1.8 | 1 |
5 | nozzle cap | 1 | 32 | Cap of Relief valve | 1 |
6 | nozzle filter | 1 | 33 | Spring of Relief valve | 1 |
7 | Bend | 1 | 34 | Spring Retainer Ring | 2 |
8 | Seal Washer | 1 | 35 | flat washer | 1 |
9 | Valve Body | 1 | 36 | Funnel | 1 |
10 | valve tablet | 1 | 37 | Funnel Washer | 1 |
11 | valve plug | 1 | 38 | Tank | 1 |
12 | Spring | 1 | 39 | Strap ring | 2 |
13 | Valve Cover | 1 | 40 | Strap fastener | 2 |
14 | Spray lance O-ring | 2 | 41 | strap | 1 |
15 | sprayer lance cap | 2 | 42 | Hose cap II | 1 |
16 | spray lance | 1 | 43 | connector | 1 |
17 | shut-off body | 1 | 44 | Suction hose | 1 |
18 | shut-off pin | 1 | 45 | small strainer | 1 |
19 | press plate | 1 | 46 | Water-Proof Washer | 1 |
20 | Handle seal ring | 1 | 47 | Pump Gasket | 1 |
21 | O-ring Φ6.8×1.6 | 2 | 48 | Cylinder | 1 |
22 | valve plug | 1 | 49 | Pump handle | 1 |
23 | O-ring Φ7.9×19 | 1 | 50 | Cylinder Nut | 1 |
24 | Shut-off spring | 1 | 51 | Guide Base | 1 |
25 | Shut-off seal ring | 2 | 52 | piston | 1 |
26 | Shut-off nut | 2 | 53 | piston o-ring | 1 |
27 | shut-off handle | 2 | | | |
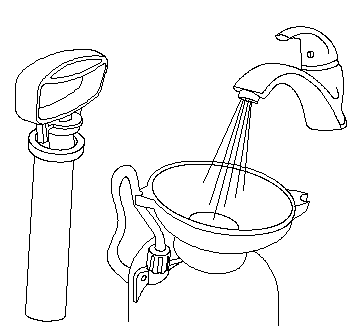
VII. Cleaning and Maintenance
Upon finish of spraying, repeated flushing and pressurized spraying with clean water at an allowed place is required till the discharged liquid is clean.
The strainer at the front end of suction hose can be disassembled for flushing.
The nozzle shall be flushed with water. Never use a hard tool to remove the impurities in the nozzle holes. Apply some lubricant to the O-ring in the nozzle after cleaning.
You shall apply some Vaseline or low viscosity grease to the piston O-ring after continual use for a period (for example, half a month, a month or two months), or upon reuse after long-time storage.
 VIII. Warehousing
The Sprayer should be stored in a dry place indoor out of reach of children.
The gas inside the tank shall be released before storage. Pressurized storage is prohibited.
IX. Troubleshooting
Problems | Causes | Solutions |
Leakage or poor spraying occurs | · The seal-ring loose or is damaged · Nozzle strainer or suction strainer is blocked · Nozzle is blocked | ·Re-tighten up or replace ·Clean ·Clean or repair |
Pump handle is too heavy to operate | · Piston O-ring insufficiently lubricated · Too high pressure in the tank. | ·Apply lubricant to piston O-ring ·Stop pressurizing. Check the relief valve for jamming. Repair it if necessary. |
Pump handle is too light to operate | · Piston O-ring wears off or comes off. · Water-proof washer comes off | ·Replace the piston O-ring ·Repair |
Spray air instead of water | · The suction hose inside the tank comes off | ·Remove the hose cap and take out the suction hose to tighten. |
No spray jet or uneven spray jet
| · Clogged | ·Have the suction hose and nozzle check and cleaned |
Packing List
S/N | Description | Unit | Qty. | Remarks |
1 | Sprayer | unit | 1 |
|
2 | Spray lance | piece | 1 |
3 | Spray nozzle | Piece | 1 |
4 | Pressure Regulating Valve | Piece | 1 |
5 | User’s Manual | piece | 1 |


 In
In 


